“Let’s help the children”
Web Design - Client Project - 2025
This project was an assignment in the Web Design course, but also an opportunity for a SRG to create a website to gain greater visibility. We had to respect the client’s needs and desires:
- Make the site visible to reassure future young people who will be living at the Vieux Moulin;
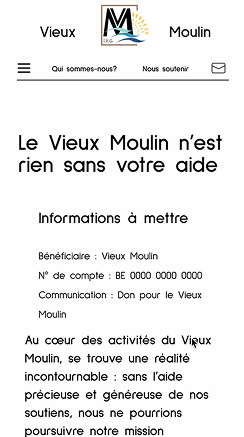
- Enable donations and encourage more volunteer work;
- Give judges access to court documents;
- Also reassure parents about their child’s admission to the Vieux Moulin.
Obviously, the entire site had to be user-friendly, attractive, and user-friendly.
1 - Research - Specifications
First, we had to create a specification that met the client’s requirements. The specification included:
- General Overview
- Context (educational project, donations)
- About (SRG, foster children, etc.)
- Site Objectives (reassurance, donations, visibility, etc.)
- Client Desires (life, colors, photos, realism, etc
- Analysis
- Benchmark (analysis of the existing site and competition)
- Target Audience
- Functional Specifications
- Traffic Structure (lists of topics)
- Sectioning (navigation)
- Functionality (contact, donations, etc.)
- Technical Constraints (accessibility, usability, etc.)
- Resources and Tools
- Content (donations, house, history, etc.)
- Tools (WordPress)
- Schedule
- Organize to deliver the project on time
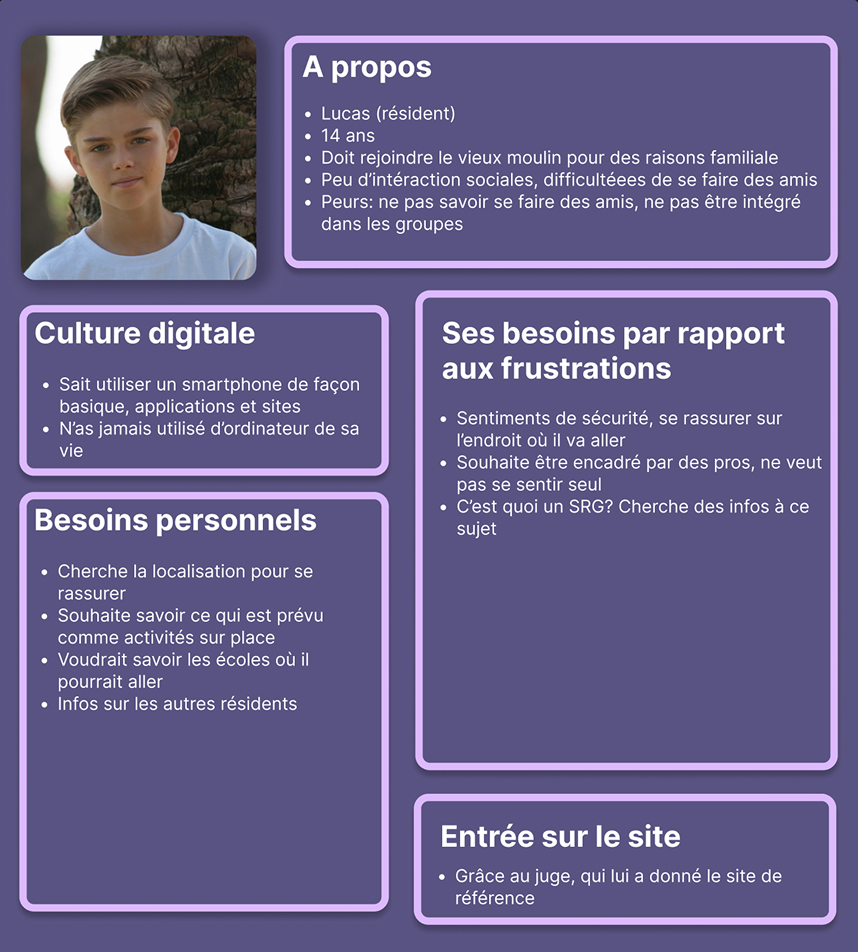
2 - Research - Personae
Next, we created personas, people who have certain needs and who serve as a guiding principle for creating our wireframe. They all embody different profiles that are used to create the site and who could be potential users. Here, the personas have the following profiles: young people who are returning, parents, donors, volunteers, businesses, future employees, former residents, and judges.
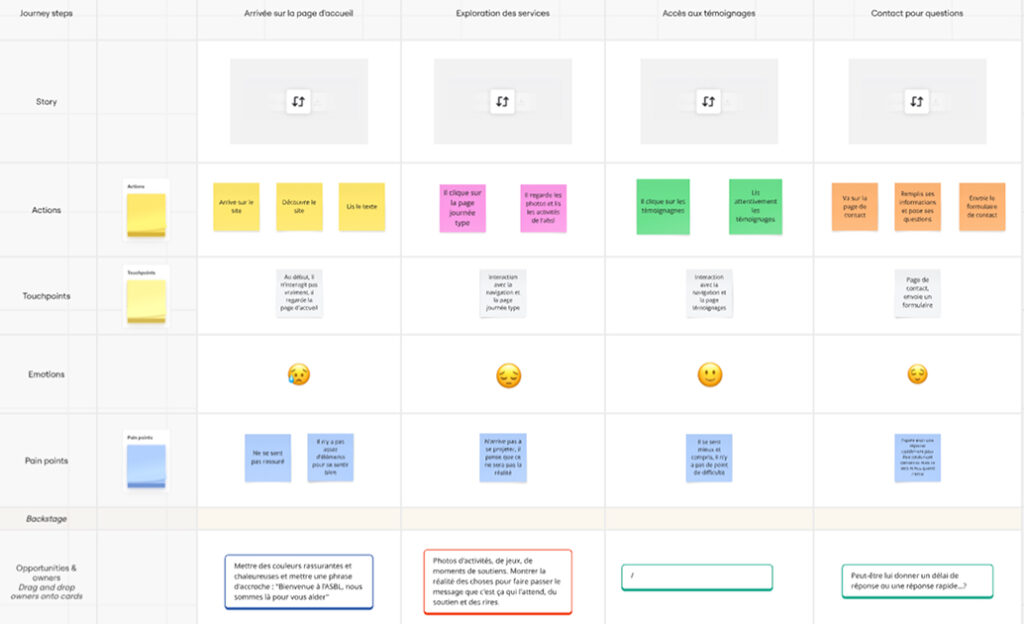
3 - Research - User journeys
The next step is to create user journeys for the personas. User journeys are the path the user will take from entering the site to leaving it. These journeys include the user’s interaction with the site, their feelings, any problems they might have, and solutions. This allows us to see what we can add to our site, what users might feel, and what we want them to feel.
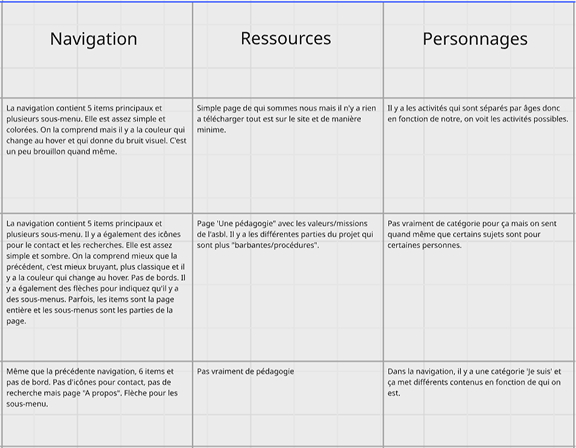
4 - Research - Benchmark
After completing the courses, the final stage of the research is the benchmark. We take three sites that have the same function (including one that was presented by the client) and analyze them according to a grid we construct.
Following this, we remove similar elements that we find interesting for our site.
Here, I took a site for a youth center in Saint-Ode, a site for school dropouts, and another that closely resembles our client’s site on another SRG.
Sometimes we can also analyze the existing site if there is one, but here it was really minimal.
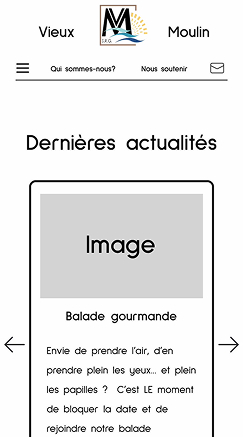
5 - Creation - Wireframe
Next, we begin the design with the wireframe. We create our purest design, without color or font, just with the layout we want and the elements: text, images, navigation, etc. This part allows us to see how we can arrange things and what we can put in them. Here, it remains fairly classic.
6 - Inspiration - Moodboard
Next, we move on to the mood board for our future site. We add the main keywords associated with the client and the project; they will help us find several atmospheres and inspirations for the design. So, for each keyword, we will look for sites or designs that will be in line with this word and that could be a lead for the client. This also allows us to show them what style we want to go for and see if it suits them before starting the design.

7 - Creation - Design
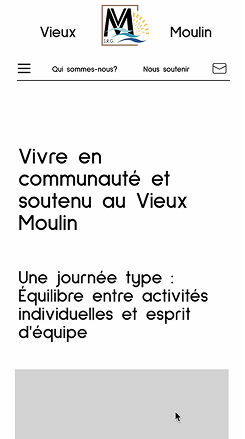
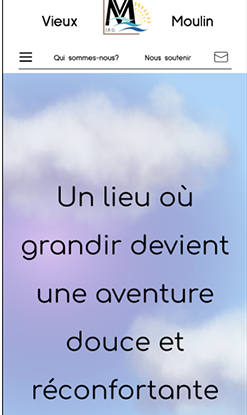
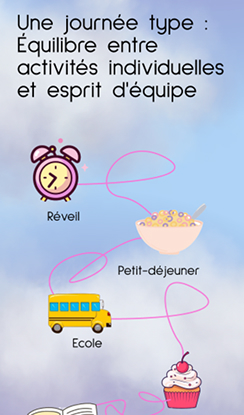
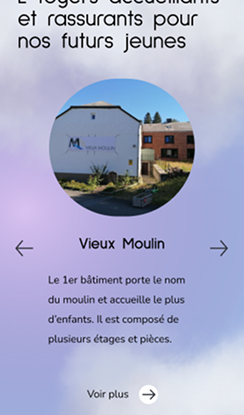
This is the design stage. We add the font, images, color, and everything else needed to create an attractive and user-friendly design. For this site, the most important thing was to attract young people through color, images, drawings, and more. We really needed a design for children, to reassure them and provide them with a little relief.
8 - Creation - WordPress/CSS/JavasScript
The last step is to create the site. For this project, we had to use WordPress as a CMS, it’s a tool that allows you to easily create, manage, and modify a website without having to code everything by hand. This will allow the client to easily manage their site without breaking everything. We need to make the interface manageable and as easy as possible for the client. To modify this, we need to do the PHP, this is where we will add the different fields, for example: houses, donations, rules… This part replaces the HTML part. Afterwards, we still need to do CSS or SCSS to style the site and also JavaScript to animate the site.